Wednesday, February 29, 2012

It's "40 Bag Challenge" Time!

I guess this must be the official month of challenges. Not only have I started my "local and organic challenge", I have also decided to do a "40 Bag Challenge", inspired by Sarah over at Clover Lane. The gist of it is to rid your house of 40 bags of clutter over the course of 40 days. Sarah does hers as a Lenten ritual, starting on Ash Wednesday, but you could start anytime you want! I think this is a great time of year to do this kind of deep decluttering as a kick-off to spring cleaning. If you want more details and guidance as to how to go about this systematic decluttering process, follow along with Sarah's posts on this topic every Wednesday. Hopefully I will have a couple of useful things to say as well as I go about my own 40 Bag Challenge! I really believe decluttering is an essential part of household management in a busy family home; in fact I even wrote a post last year about five ways decluttering saves you money!

We kicked off our 40 Bag Challenge last week by sorting through my boys' old gaming equipment and games. They have managed to accumulate quite a lot over the past few years and it was high time to do a purge. They had a GameCube they were no longer using, as well as a dozen or so games for it. We posted those on Kijiji and happily sold them yesterday (the profits are going towards a laptop they are saving up for!). We are also trying to sell a bunch of other games they are done with as well. We still need to do a more in-depth clean out of both of their rooms, but this was a good start.

Another area I decided to tackle early on was our container cupboard, which had degenerated to a horrifically disorganized mess over the past few months:


After taking everything out, sorting and purging I was able to get everything back in there in a much more harmonious arrangement. We had an unbelievable amount of lids for yogurt/sour cream containers (which I use to freeze homemade stock). A couple dozen more lids than containers - I have no idea how that sort of thing happens (I suspect they breed in the night). Tossing those, along with a few other lids that no longer had containers, cleared up a lot of extra space. I also removed a bunch of older plastic containers and relegated them to non-food use. Once I was done, it looked like this:


I am thrilled that I'm no longer afraid to open our container cupboard for fear of random items whacking me in the head, and I can easily locate what I need now without wading through a sea of jumbled-up containers.

The next couple of areas I plan on tackling are the armoire in our dining room, which is packed full of all kinds of random art supplies, games, and other assorted detritus which has randomly accumulated there, and my boys' closets, which are kind of frightening at the moment, too.

Care to join me in your own 40 Bag Challenge? I would love to hear how you do with it!

Monday, February 27, 2012

Weekly Menu Retrospective #60


Welcome to my weekly roundup of the past week's eats. I prefer to report what we ate in the last week, rather than what we're planning to eat in the coming week. Why? The reason is pretty simple: although I usually have a general idea of what we're going to eat in the next week or so, life often unfolds a little differently than planned, and I adjust my menu plan on a near-daily basis to accommodate leftovers and other not-possible-to-plan-ahead circumstances. I find this is the easiest way to ensure that I minimize our family's food waste. I'm also willing to admit that I'm a rather spontaneous cook, given to preparing foods that strike me as the most appealing thing to eat right here and now!

If you'd like a whole book full of inexpensive, quick and kid-approved recipes,
my book, Cheap Appétit : The Complete Guide to Feeding Your Family for Less Than $400 a Month (While Eating Better Than You Ever Thought Possible) IS NOW AVAILABLE on Amazon (Amazon.com, Amazon.ca and Amazon UK) and Barnes and Noble.  I've included page references to recipes that are in the book in my menu plans so you can locate them quickly. For more details about the book, go here. 
 
Breakfasts: Pumpkin Oatmeal Chocolate Chip Muffins (variation of this recipe on p. 96), Granola (p. 92), French toast, waffles

Lunches: leftovers, sandwiches, pizza

Dinners:

Monday: Spicy Peanut and Tomato Soup (p. 163)

Tuesday: Pancakes and bacon

Wednesday: Black Bean Chili (p. 160)

Thursday: Lemon and Garlic Chicken (p. 184) Lemony Spinach Pasta (I made this recipe (p. 150) without the chicken and served chicken drumsticks alongside)

Friday: Lentil Dal Burgers, Easy Oven Fries (p. 194)

Saturday: Sausage with Onions, Apples and Cabbage (recipe coming soon!), Coconut Rice (p.199)

Sunday: Italian-Style Baked Pasta (p.172), carrots, Amish Oatmeal Pie (p. 221)

In keeping with my local and organic challenge, I'd also like to note the local and/or organic items on this week's menu:

Local: apples, cabbage, onions, carrots, potatoes

Organic: coconut milk, raisins, oranges, orange juice, turbinado sugar (in coffee), palm sugar (in granola)

Local AND organic: oats (in Granola and Oatmeal Pie), popcorn

For more great meal ideas, check out Menu Plan Monday at orgjunkie.com.

Friday, February 24, 2012

Local and Organic Challenge: My February Food Coop Order

As I mentioned in my previous post about my local and organic food challenge, one of the steps I have recently taken to increase the amount of local and organic food items I purchase without busting my budget is to rejoin the food coop I was a member of several years back.

The way the Ontario Natural Food Coop works is that you form a buying group with a bunch of other families, then place your order through a catalogue. ONFC has a set delivery route and schedule, and they deliver the entire order to the group coordinator's house on the appointed date.

Yesterday was our delivery day, and we had 23 boxes of food dropped off at our coordinator's house. The buying group is responsible for sorting out all the items into the individual family's orders, a task that usually takes a couple of hours. I helped with the sort yesterday and always enjoy checking out what goodies other members have ordered!

This is what I got in my order:


Starting from the back of the photo (on the chairs):
170 g bag Nature's Path organic puffed kamut, $2.75
170 g bag Nature's Path organic puffed millet, $2.75
1 kg Oak Manor organic popcorn, $5.75 (grown in-province)
1 kg Oak Manor organic sesame seeds, $6.76 (?possibly in-province)
1 kg Camino turbinado sugar, $5.89
681 g of Wholesome Sweeteners fair trade organic light brown sugar, $5.75
1 litre Soleil d'Or cold pressed organic sunflower oil, $11.27 (produced in Quebec)
2 x 1 lb boxes of Eden organic dried black beans, $7.16

In front of the chairs:

4 litre bag of Organic Meadow homogenized (whole) milk, $11.13 (produced in-province)
2 x 946 mL bottles Black River organic orange juice, $5.84 (bottled locally)
2 x 1 litre bottles Nature Clean liquid hand soap, $13.00 (Canadian company)
1 kg Oak Manor organic pumpkin seeds, $10.31 (?possibly in-province)
1 kg Oak Manor organic sunflower seeds, $5.55 (possibly in-province)
1 case (12 x 400 mL cans) Thai Kitchen organic coconut milk, $26.15
10.2 kg bulk organic unsulphured raisins, $59.30 (?possibly in-province)
12 kg bag Oak Manor organic oats, $30.99 (grown in-province)

Grand total: $208.28 (after a 1% COD discount).

Now, you may rightly be wondering why I spent such a huge chunk of our monthly grocery budget (which we aim to keep under $400) on massive amounts of raisins and oats. The answer is that by purchasing these items in such large quantities, I got really fantastic deals, which dropped the price per pound to roughly what I was paying for grocery store, conventionally grown raisins and oats. The raisins will likely last us about a year, and the oats somewhere between 6 and 9 months, so I won't have to buy them again for quite a while! That means that next time I order (in about 2 months time) I'll be able to buy other items in large quantity and get similar discounts. By staggering my bulk purchases, over time I'll build up a good stash of everything I need without ever blowing my grocery budget. I based this month's order on items we were already running low on, and next time I'll do the same thing and select which items to order in large quantity based on what we are running low on in our stockpile at that time.

Some of the particularly good deals (other than the raisins and oats) were the pumpkin seeds, which cost substantially less than what I was paying at the bulk food store for conventionally grown ones, the case of coconut milk, and the Nature Clean liquid soap (again, about half of what I was paying previously). I'm going to use the milk to make yogurt so I can have organic yogurt for significantly less than I'd pay for it at the grocery store!


I'm aiming to keep my food coop orders around $200 each time (every other month), then spend an additional $300 a month so it will average out to no more than $400 a month over the course of the year.

I'm really pleased with what I got in this order and look forward to doing it again in a couple of months!

Wednesday, February 22, 2012

I'm Celebrating My Book Launch with a "Local and Organic" Food Challenge!


Today is the official launch of my book, Cheap Appetit: The Complete Guide to Feeding Your Family for Less Than $400 (While Eating Better Than You Ever Thought Possible), and if you purchase a copy today, you'll receive over $1000 in bonus gifts! So you'll not only get tips on slashing your food budget and over 125 family-friendly recipes, you'll have the opportunity to receive some special bonus items on a variety of topics. For complete details on how to receive your free gifts, go here


To celebrate my book's big day, I am issuing myself a "Local and Organic Food Challenge" to see just how much local and organic food I can cram into our less-than-$400-a-month food budget!

Several years back, I had started buying more organic foods, then we ended up having to slash our budget dramatically due to financial circumstances. At that time, I didn't feel like it was possible or practical to purchase organic items on our cut-to-the-bone budget. Now that I've become an expert at how to feed my family for as little as possible, I've started to feel up to the challenge of making yet more changes, and seeing how far I can go in supporting local and/or organic food suppliers without busting my budget!


I have always bought a lot of local food in season - I don't think I've purchased apples, onions, potatoes, carrots or cabbages grown out of province in many years! And we love to support local pick-your-own farms as well. But I'm ready to start exploring more options. For the purpose of this challenge, I'm going to define "local" as in-province, although much of the Ontario-produced food sold around here comes from pretty close by.

As I've gotten ready to take on this challenge and started looking around at different possibilities, I've been surprised that I've already located sources for buying quite a few organic food items at the same price (or even lower) that I was paying for conventionally grown foods. One of the first steps I've taken is to rejoin a food coop that I was a member of several years ago, the Ontario Natural Food Coop (ONFC). Through a local buying group, we can order a wide variety of natural and organic food items at discounted prices (sometimes very deeply discounted compared to what you would pay at the grocery store!). Many of the products are also grown in-province, which is an added bonus.

Basically, I'll be using many of the same strategies that I've always used to keep our food bill low, with slightly different goals in mind:

1. Know your prices: To get the best deals, you need to know your prices well! Because I have a good handle on what we usually pay for each type of food we buy, I am quickly able to spot the potentially good deals as I evaluate new options for buying organic foods.

2. Buy from a variety of sources: There is no single source that will always have the best deal on everything. Even the food coop, which has absolutely fantastic prices on many items, is not the lowest-priced source for everything I want to buy.

3. Buy in bulk: To get the best price possible, you often need to buy in bulk. Sometimes that means buying a pretty crazy amount of a particular item at once! I just ordered 13.6 kg of organic, unsulphured raisins from the food coop, which probably seems a little nuts. Ordering in such a large quantity brought the price per pound down substantially; in fact it's about equivalent to what I would pay for grocery-store raisins!

4. Buy ingredients, not products: I will be able to make my own organic granola for far cheaper than I can buy a prepackaged brand! In fact, since I have found fantastic deals on nearly all of the ingredients, I will be able to make my own organic granola (with mostly locally grown foods) for nearly as cheap as I can make it using conventionally-grown foods.

5. Stockpile, store, and plan: This method of buying food is quite different than the shop-for-this-week's-meals style of grocery shopping that most people are used to. We are certainly not going to eat all those raisins in the next week, or even the next month (they will probably last us about a year). To purchase food in this way, you need to have a plan so you know what foods to buy when, and also be prepared to store large quantities of foods (and to do so in a way that ensures they won't spoil before you use them up!).

All of these concepts, and many more, are thoroughly outlined in my book and I will enjoy taking my food-buying skills to a new level!


Don't forget to go claim your free bonuses if you buy TODAY!

I will be sharing regular updates on how I'm doing with this challenge, so stay tuned to see just how far I can go! And if you happen to have any lines on great food at awesome prices in Southern Ontario, be sure to let me know, okay?

Saturday, February 18, 2012

How to Get What You Want Without Money

The bounty from my produce cooperative's final swap of the season 

Money can be a really handy tool for procuring the things you need and want - but it's by no means the only way to do so! You might be surprised at just how many things can be achieved without using money, if you are willing to be resourceful. Whether your budget's particularly tight, or you just enjoy the sport of acquiring goods and services without having to exchange any money for them, here are some ways to go about it: 

1. Put the word out
Let your friends and family know what you're looking for - it may be something they have lying around that they can't wait to get rid of! Put a "wanted" request out to your local Freecycle group. I've given many things away through my local group, so I have no qualms about asking for something when I need it. You can also put a "wanted" ad on Craigslist and Kijiji. While you're there, check out the "Free" sections on these sites - you may find a listing for the exact item you need. We've received a lot of wonderful items through these avenues - including a washing machine (that ended up lasting us 5 years), some good quality dress shirts my husband is still wearing several years later, and a perfectly good television we've been using for the past couple of years.

2. Become a scavenger
It's surprising what you can find lying around at the side of the road or by a dumpster in a parking lot. While I'm not quite brave enough to venture into full-on dumpster diving, I'm quite happy to drag something home I found in a neighbour's trash pile. Almost every bike my kids have owned came from the side of the road (as well as the mountain bike that is my primary mode of transportation). Most of these bikes needed some type of overhaul to make them functional, and since my hubby's a pro at that sort of thing, he's happy to take on the challenge of bringing them back to life (although often, they only needed pretty simple repairs to make them functional again). We've also found a perfectly good TV stand (to hold our free TV), free hostas for the garden, and a wide variety of other odds and ends we've put to good use. My husband also knows a couple of good spots to find piles of discarded wooden pallets, which are an excellent source of free wood for small building projects (such as the planter boxes on our deck).

3. Swap, swap, swap!
You never know what you might have that someone else might want - whether it's no-longer-needed possessions gathering dust in your basement, or special skills and talents that others can benefit from. It's easy to do informal swapping with friends and neighbours. Sometimes you might swap related items (i.e. trading childcare services with each other, or swapping different types of garden plants), or maybe you could swap a haircut for some lawn and garden cleanup. If you really love to barter, you can take swapping to the next level and join a more formal bartering group. There are a growing number of these types of organizations available, as interest in bartering is growing around the world. LETS (Local Exchange and Trading Systems) are going strong in many areas and allow members to trade a wide variety of skills and services with one another; you can search for a local group here. A dedicated bartering site which is growing in popularity here in Canada is SwapSity, which I am planning to get more involved with this year. You can also search for trades and swaps on more traditional classified sites like Craigslist and Kijiji. A couple of years ago, I posted an offer to swap plants on Kijiji and ended up receiving enough perennials to landscape my entire front garden for free! Swap groups can also also have a specific focus; produce cooperatives (where local veggie gardeners swap their surplus garden produce) are gaining in popularity and the group I started last year got off to a good start. Some of these groups have evolved to become general food-swapping groups with a wide variety of edible offerings, such as the Boston Food Swap.

4. Be creative.
I've long thought that creativity and resourcefulness can be much more powerful tools than money. Sometimes, it may take a combination of several strategies to figure out how to get what you want with little or no money. Combining scavenging or swapping of materials with skills such as carpentry, wiring, or sewing may be necessary to create your vision. Need a new rug? With some old sweaters or T-shirts from Freecycle, you can easily make one. A few pieces of beaten up, trash-picked furniture might be disassembled and rebuilt to create the exact piece you're looking for. Busted up hockey sticks and an old futon frame can be transformed into a conversation-starting Muskoka chair. Take a close look at your junk before you discard it - it may have a second (or third) life you hadn't considered!

Have you ever gotten something great without using money? If so, please share the details with us!

Wednesday, February 15, 2012

The Frugal Fixer-Upper: Front Entranceway Makeover, Part 4

When I shared the latest update on our front entranceway makeover a couple of weeks ago, I promised some pictures of our new built-in storage unit once it was all finished.

Well, after a full day of my husband and our carpenter neighbour building and installing it, plus a few afternoons of work on priming and painting it, I finally have a photo of the final product to show you! But before I do, I'll just remind you what this space looked like before:

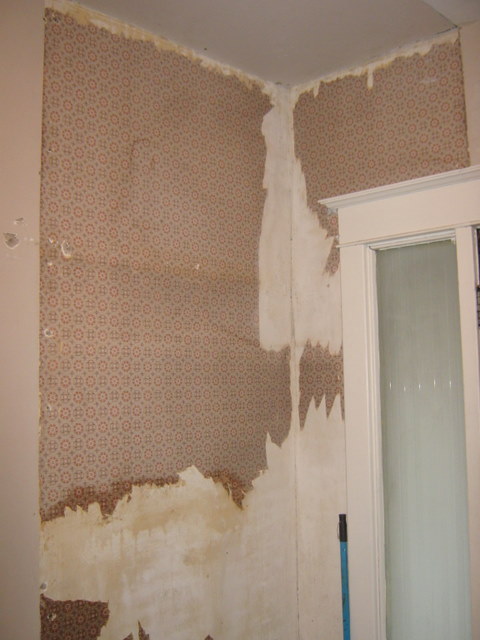
And here is what it looked like after we cleared everything out to repair the wall and ceiling and paint:


Here is what it looks like now:

Just a slight improvement, don't you think? What I love about this design is that not only does it appear much cleaner and less cluttered, there is actually more storage space than there was with our previous setup. We now have space for 12 pairs of shoes and boots, compared to 9 pairs previously. We also have room for more coats, plus attractive storage for our hats and gloves in the baskets above the coats. The top shelf holds umbrellas, shopping bags and other similar items that are handy to have by the door.

I'm really pleased with how much storage we've managed to get in such a tight space, without overwhelming the entranceway area at all. This unit actually holds much more than the horrible closet we ripped out, while taking up much less space.

We have finally managed to take our front entranceway from a majorly embarrassing eyesore to one of my favourite spaces in the house. I can finally open the front door and feel good about what people see when they step inside!

While I do love our new look, it sure took a lot more time and money to get it to where it is than we originally anticipated (other owners of old fixer uppers will not be shocked by this at all, I'm sure!). Still, we spent a lot less than many other people would have to get the same result, since we did most of the work ourselves.

A final cost breakdown of the different stages:


Stage 1: The Great Rip-Out and Refinish
This was the part we did shortly after we moved into this house, so nearly 9 years ago. We ripped out the closet and old carpet on the stairs and upper and lower hallways. Hubby then refinished the stairs and we cleaned up the hardwood floors under the hallway carpets.

This stage was mostly elbow grease and time and didn't cost much at all. As it was several years ago, I don't remember the exact cost, but it was basically wood stain, varnish and paint, some of which we probably already had on hand at the time. I'd say we didn't spend more than $50 for this stage.

Stage 2: Replace the banister
This stage was documented here and cost $420

Stage 3: Repairing and Painting Walls/Build Storage Unit/Accessorize

This final stage ended up costing us more than we anticipated, but when I think about how much we would have to have paid someone else to do all the taping, plastering and sanding that my husband did to repair the walls and ceiling (I'm guessing several hundred dollars) I guess we still ended up doing okay!

If you missed my last update, you can see all the other "after" pictures here.

Expenses for this stage:

Paint: $306.93
We ended up buying a lot of paint! 1 can of ceiling paint, 2 cans of primer, 2 cans of Weston Flax (the wall colour) and a can of high gloss enamel that I used to painted the table. I'll use the enamel paint on a few other pieces of furniture, and we still have enough primer left to (hopefully) get through most of the doors on the second floor (there are *seven* if you can believe it - bathroom, 3 bedrooms, 2 closets, plus the door to our third floor attic bedroom!) We got a 20% discount on the paint for buying 5 gallons or more at a time. The staff kindly told us that if we kept the receipt, we could get the discount if we came in later to buy another gallon or two.

Storage Unit: $335
We spent $135 on materials, and $200 on labour to hire our carpenter neighbour to help my hubby build this. It was worth it as it ended up being a more fiddly project than it looks at first glance. They cut out the back to fit around our antique baseboard, which we did not want to rip out, plus there were a few other challenges involved. The paint we used for this is included in the paint costs above. The storage baskets we have had for several years, and we build the shelf to fit them.

Miscellaneous building supplies: $91.40
This includes stuff like the plastic we sealed off the doorways with during sanding, drywall compound, spray paint, a piece of drywall for the ceiling, and a couple small pieces of equipment we'll be able to reuse for another project.

Accessories: $25 max (estimated)
As I documented in my last update, all the finishing touches such as the mirror, table, baskets, etc. were secondhand finds I've collected over the years and I'm sure I didn't spend more than $25 on these items.

That brings the grand total to just a hair under $1230.

It's certainly not an insignificant amount of money, but as I already mentioned, if we had paid someone else to do all the things we've done ourselves, it would have cost several times more! If you're going to be fixing up a house, it really pays off to learn as many skills as you can. My husband had never taped and plastered corners before we fixed up our side entrance. He got a lot of good practice with that project, and felt much more confident about his skills in that area by the time we tackled the front entranceway. Because he has some pretty solid carpentry skills, he was able to work alongside our professionally trained neighbour to help build the banister and storage unit. This meant that the projects were completed in less than half the time they would have been if our neighbour had been working alone, so we paid a lot less in labour costs and still got professional quality work done.

We also did this makeover in several stages as we had the money available, meaning we didn't lay out all the cash at once. When we moved in, we didn't think it would take us this long to get the final stages completed, but sometimes life takes you on a few detours! Having waited quite a while to have this completed, I think we appreciate it that much more now that it's done.

We'll be taking a bit of a break from major household improvement projects for a while to relax and enjoy our latest accomplishments (and let our bank account recover!). We hope to do some work on our kitchen in the not-too-distant future, as it's been in a halfway redone stage for quite a while.

In the meantime, if you've done some budget home renovation projects lately, I'd love to hear about them!

Monday, February 13, 2012

Weekly Menu Retrospective #59


Welcome to my weekly roundup of the past week's eats. I prefer to report what we ate in the last week, rather than what we're planning to eat in the coming week. Why? The reason is pretty simple: although I usually have a general idea of what we're going to eat in the next week or so, life often unfolds a little differently than planned, and I adjust my menu plan on a near-daily basis to accommodate leftovers and other not-possible-to-plan-ahead circumstances. I find this is the easiest way to ensure that I minimize our family's food waste. I'm also willing to admit that I'm a rather spontaneous cook, given to preparing foods that strike me as the most appealing thing to eat right here and now!

BOOK UPDATE: My book, Cheap Appétit : The Complete Guide to Feeding Your Family for Less Than $400 a Month (While Eating Better Than You Ever Thought Possible) IS NOW AVAILABLE on Amazon (Amazon.com, Amazon.ca and Amazon UK) and Barnes and Noble.  I've started putting page references to recipes that are in the book in my menu plans so you can locate them quickly. For more details about the book, go here. 


Breakfasts: Granola, Aloha Muffins, peanut butter toast, Blueberry Clafouti, Rhubarb Streusel Muffins

Lunches: leftovers, sandwiches, pizza

Dinners:

Monday: Black Bean Chili (p. 160), cornbread (p.212)

Tuesday: Pad Thai

Wednesday: Everything-But-the-Kitchen-Sink Lentil Soup (p. 162)

Thursday: Lime and Garlic Chicken (p. 184), Colourful Cabbage Salad (p. 207), Easy Oven Fries (p. 194)

Friday:  Sausage, Broccoli and Mozzarella Egg Puff (variation of Spinach, Bacon and Mozzarella Egg Puff, p. 181), leftover cabbage salad

Saturday: Hubby and I out for dinner (at younger son's hockey fundraiser dinner), leftover buffet for boys!

Sunday: Parmesan Baked Fish (p.191), Barley Pilaf (p.198), Broccoli, Bacon and Cheddar Salad (p. 204), Raspberry Cream Cheese Squares (p. 222)

For more great meal ideas, check out Menu Plan Monday at orgjunkie.com.

Saturday, February 11, 2012

"Life Editing" and Happiness

This morning I happened to stumble across this video of Treehugger founder Graham Hill giving a TED talk on why "less is more". Obviously, that's not exactly a new idea, but I enjoyed listening to his take on the concept.


 I'm not sure I'd ever want to live in a 420 square foot apartment, no matter how well designed, but I suppose I do practice my own form of "life editing" as he calls it.


Our family of four does live in what I would consider to be a fairly large home (a 2 1/2 story double-brick, 87 year old place that's almost 2000 square feet). I have to admit I've been pretty astonished at how many people have remarked on what a "cute little house" we have. I find it alarming that anyone would consider our home small, but I guess 3000-4000 feet is considered standard space for family living by many people these days. I also find it pretty scary that even though the average home is now three times the size it used to be, storage units are a booming industry because people can't fit all their "stuff" in a house that size.

While we do like our home (even with all its fixer-upper challenges), more important to us was its location in an extremely walkable neighbourhood with lots of other families. Since everything from the grocery store to the bank, library, drugstore, coffee shop, hairdressers, wooded hiking trails, park, public pool and arena are less than a 10 minute walk from our house, we can easily get by with just one vehicle (in fact, for three years we didn't have one at all, but now my husband really needs one for his job). Also, since there are many other families in our neighbourhood and our kids' closest friends live on the same block as us, there is no setting up of playdates and shuttling around of kids - they happily meander back and forth from one house to another whenever it's convenient. Now that they are old enough, they can also take themselves to the swimming pool, arena and park when they want to play with their friends or when they have hockey practice or swimming lessons. I consider cars to be a ginormous hassle and expense and I really can't understand why anyone would want one unless they absolutely needed it. So we are very happily a one car family (and again, so many people have commented that they just don't know how we manage with "only" one car).

We are also a family that loves our camping vacations, and we usually go on one to three camping trips each summer. A lot of people are surprised that since we love to camp so much, we have not gotten ourselves an RV. Well, let's see: Our $200 tent is easy to store, requires very little maintenance, packs into our van easily (and we can even pack it on one of our bikes should we want to go bike touring) and we can set it up just about anywhere. RVs cost tens of thousands of dollars, need to be insured and stored somewhere secure, take a good deal of time and money to maintain, are a huge hassle to tow, and can only be used in sites specifically designed for them. Sure, they might be a *tiny* bit more comfortable, but honestly, for the teensy bit more comfort and shelter they provide, I just don't feel they are worth it considering all the drawbacks! And I really, really, really don't want the capacity to watch television while on a camping trip :)

As far as the smaller stuff goes, I try to think carefully about whether we really need something before bringing it into our home, and if we had something in the past and it breaks, I think about whether it needs replacing before running out and getting a new one. When our microwave died a few years ago, we decided we didn't need to replace it. It freed up a bunch of space in our modest-sized kitchen, and we haven't missed it one bit! When our ancient popcorn air popper died, we decided to start making popcorn in a pot on the stove and found we enjoyed it even better than air-popped. I also don't have a cell phone because I just don't need one (I'm rarely more than a couple kilometres from home, and since I usually walk or bike places I don't need to worry about having car trouble!). No one needs to get a hold of me that urgently that they can't wait until I've gotten back from wherever I might have gone off to - and personally, I like knowing that if I'm on an exercise walk or bike ride that I am going to have some nice peaceful time to myself without any interruptions.

We try to purge stuff pretty ruthlessly around here as well. My husband's office is in the same plaza as a Value Village, so it's super convenient for him to drop off items we're no longer using (I will often offer things on Freecycle first, but sometimes I just really want the stuff out of the house ASAP!). I'm pretty impressed with how easily my kids let go of things they no longer need - they tend to be better about it than I am, actually!


One "mimimalist" trend that I have not embraced at all is that of digitalizing everything (papers, photos, books, CDs, DVDs). Sure, you can convert just about anything to a digital file these days and I know that's definitely a space-saving feature. The thing is, I just don't like it! I really prefer to have a bookcase full of real books, and to hold a book while I'm reading it rather than an e-reader. I still also prefer CDs to wrestling around with organizing music on an Ipod. And I also love my filing cabinet full of papers :). I absolutely loathe spending time organizing digital files and also worrying about backing them up in case my technology dies.

My own form of minimalism in this area is to simply not own more than I need. I do have two bookcases full of books, but I purge them regularly. I only keep the ones I really need or truly love, and borrow most items I read from the library. We probably own less than 20 DVDs, only ones that are real family favourites that get watched many times. The rest we borrow from the library. In general, I feel most stuff that's for transient entertainment purposes, we don't need to own when it's easy enough to borrow.

As I think about the many areas of our life where we have deliberately chosen less "stuff" than other people, I think it has led to less stress and hassle, much less money spent, and more time to do the things we really enjoy.

What do you think? How much space and "stuff" is enough? 

(I think the answer is different for each person or family, but it seems pretty clear to me that a lot of people could benefit from choosing to live with a lot less.)

Wednesday, February 8, 2012

In a Flap Over Backyard Chickens


I've had a bad case of "chicken envy" for quite a while, as I have quite a few friends scattered all over North America who keep their own chickens (and just love to post about their fresh eggs on Facebook!). While more and more cities and towns are allowing residents to keep chickens in their backyards, in my city (Hamilton, Ontario) it's currently illegal to do so. There is a big brouhaha currently going on as the pro-chicken contingent has dug in their heels to help try and get legislation passed to allow backyard chicken keeping here. Up until just a couple of weeks ago, our city council had adamantly refused to examine this issue at all. Thanks to a big push by our local pro-chicken group, the issue went on the table again and our councillors voted (by a narrow margin) in favour of doing more research on this topic. So we have opened a window of possibility to hopefully gain the right to keep our own chickens.

I have to wonder, as one of my more rural-living friends put it, "why is everyone so scared of a couple of chickens"? Certainly there is a lot of evidence to say that chickens pose less problems than cats and dogs, which no one gets all bent out of shape about. And if backyard chickens are not causing problems in a huge city like New York (where they are legal), then I hardly think they should be a problem anywhere else.

I believe that the benefits of urban chickens (fresh, local eggs from lovingly kept and properly fed chickens, my own personal "bug patrol" for keeping invasive insects out of my veggie garden, and the great learning experience this would be for my kids) far outweigh any small drawbacks. It's frustrating to be told you're not allowed to do something that is legal in many other places just because a few close-minded people can't bother to better inform themselves about its potential risks and benefits.

If you happen to be a local reader and are in support of the right to keep backyard chickens (even if you don't intend to keep any yourself), there are a few things you can do to help make this a reality here in our city:

Go sign this petition to the Hamilton City Council asking for the right to keep backyard chickens within city limits

Join the Urban Chickens-Hamilton, ON Facebook group where you can connect with others in support of this issue.

Write your city councillor to let him or her know you are in support of backyard chickens (if you follow the link, click on the "info" button and you'll be taken to a page where you can click to get contact information for all the city councillors). The councillors opposing backyard chickens are saying their residents have no interest in keeping them - let's prove them wrong!

Are backyard chickens allowed in your city or town? Do you have any tips for mounting a successful campaign to legalize them?

Monday, February 6, 2012

Weekly Menu Retrospective #58


Welcome to my weekly roundup of the past week's eats. I prefer to report what we ate in the last week, rather than what we're planning to eat in the coming week. Why? The reason is pretty simple: although I usually have a general idea of what we're going to eat in the next week or so, life often unfolds a little differently than planned, and I adjust my menu plan on a near-daily basis to accommodate leftovers and other not-possible-to-plan-ahead circumstances. I find this is the easiest way to ensure that I minimize our family's food waste. I'm also willing to admit that I'm a rather spontaneous cook, given to preparing foods that strike me as the most appealing thing to eat right here and now!

BOOK UPDATE: My book, Cheap Appétit : The Complete Guide to Feeding Your Family for Less Than $400 a Month (While Eating Better Than You Ever Thought Possible) IS NOW AVAILABLE on Amazon (Amazon.com, Amazon.ca and Amazon UK) and Barnes and Noble.  I've started putting page references to recipes that are in the book in my menu plans so you can locate them quickly. For more details about the book, go here. 

Breakfasts: granola, peanut butter toast, avocado corn muffins, sausage/eggs/hash browns/toast

Lunches: leftovers, sandwiches, pizza, grilled cheese

Dinners:

Monday: Spinach and Parmesan Pasta Bake (p.176)

Tuesday: Everything-But-the-Kitchen-Sink Lentil Soup (p. 162), tortilla chips and guacamole

Wednesday: Spicy Beef and Rice Skillet

Thursday: Chicken Paprika (p.185), peas and carrots, mashed potatoes

Friday: Pasta e Fagioli (p. 168)

Saturday: Pork with Apples, Onions and Cabbage, rice

Sunday: Turkey and Vegetable Alfredo, green salad with dried apricots, pumpkin and sunflower seeds and honey-orange vinaigrette, Apple Crisp (p. 220)

For more great meal ideas, check out Menu Plan Monday at orgjunkie.com. 

Friday, February 3, 2012

The Frugal Fixer-Upper: Front Entranceway Makeover, Part 3

Yes, this is the post you've all been waiting for - the one where I finally show you the "after" pictures of our front entranceway reno!

After nearly a month of taping, plastering, sanding and painting, I was so anxious to share the final results with you - and then the lighting conditions conspired to make it extremely difficult to get good photos. First it was too overcast to get good pics, then it was too bright and sunny. This is a maddening area of the house to photograph, as not only is the light never quite right, but the angles and narrow hallway make it difficult to do justice to the overall effect. So, I did the best I could, and you can get a good idea of the transformation, but  I don't think the photos do it justice - so you'll just have to stop by for a cup of coffee or tea and check it out in real life :)

If you haven't yet seen the "before" photos, you really need to check them out here and here to get a full appreciation of just how far we've come.

Here we go...

This:


 is now this:

And this:

is now this:

This hideous mess:


 is now this nice clean wall:


This area is awaiting the final step in this makeover process: a built in set of "lockers" and shelves for the four of us to store our coats, shoes, boots, hats, mitts, umbrellas, etc. The storage unit actually got built yesterday by my husband and our carpenter friend (it took the two of them an entire day to build it!) but I'm not going to show it to you until it's all painted up nice and filled with our stuff :)

Here is the best shot I could get of directly inside the front door:


And one of the top of the stairs (which you can see if you're standing just inside the front door):


(the table was a yard sale find that I painted white; the plant and framed poster have been with me since university days, and the cafe curtain on the window was another yard sale find from long ago)

I'm particularly pleased with the little details, as I'm the one who put most of them together.


Part of my plan for redoing this area was to make sure that there was a place for everything that's *supposed* to be by the front door, but to make it difficult to plonk stuff down that's not supposed to be there. The storage table we had here previously (shown in the before photos) was crammed full of junk inside and often had a large pile of miscellaneous books, papers and clothing articles piled on top of it. I had this table tucked away that we had used in our previous house but had not found a place for here. It was a garage sale find quite a few years back (I'm sure I didn't pay more than $5 for it) and was an unappealing scuffed-up dark brown. I gave it a good priming and painted it with 2 coats of high gloss enamel paint. Despite my cursing and swearing that I would never paint anything with that many spindles again, I'm pleased with how it came out.   

The basket on the top is for depositing housekeys when you come through the door so you don't misplace them. The middle shelf is for library materials that need to be returned (it seems that most days someone in our house makes our way over to the neighbourhood branch!). The basket on the bottom shelf is for things like the elastic straps we use to tie up our pantlegs when we're biking, sunglasses, and that sort of thing. Both baskets were yard sale finds, of course!

I love that this gives just enough space for the necessities, but no spare surface to put stuff down that shouldn't be there. I also like how the more delicate table allows you to see more of the sidelight paneling and the funky old air register return - the kind of cool details that make dealing with the challenges of an older home worth it.

 On the wall above and to the side of the table are a mirror which was a yard sale find from last season (it had also been an unappealing dark brown and I decided to paint it with high gloss black enamel) and an antique cheese box (yep, also a yard sale find) which will be perfect for holding outgoing mail, bottles of sunscreen in the summer, and other small random items we like to keep by the front door. The little basket inside the box is holding lip balm, pens and pencils and that sort of thing.


We decided to spray paint the two switchplates in the newly-painted areas (one in the front hallway, and one up on the second floor). I forgot to take "before" shots, but both had unappealing brassy finishes before we painted them. I think this one may have been original to the house, and I just love the detailed texture of it. My hubby replaced all three of the switches, which were either ivory or black and did NOT match our new look!

All told, we spent less than $25 on all of these finishing touches and I think they really add a lot of personality to the space.

I am *so* not in a number-crunching mood right now, so I'm not going to do a total cost breakdown right now (I promise I'll do it when I post the final pics with the storage unit!). I do know we spent over $200 on paint, which was the major expense for this stage of the reno. Oh, and in case you're wondering about the paint colour, it's Weston Flax by Benjamin Moore. I like the way it looks better in real life than in the photos though! 

Overall, I'm really thrilled with what we managed to achieve in this area of the house, although it sure took a lot more work than we bargained for!

With any luck I should have the final pictures of our storage locker by the end of next week, along with the final cost breakdown for this front hall transformation.

Wednesday, February 1, 2012

It's Mid-Winter Pantry Inspection Time!


It's February - that wonderful month where the light rapidly returns and I start fantasizing about this year's vegetable garden (that I won't be able to start planting for at least a couple of months yet).

While I'm waiting for this year's growing season to start, it's a good time to take stock of the fall produce I've been storing over the winter and see if there's anything that needs my attention.

Onions: I buy these in 10 lb bags when they go on sale in the fall. Usually they keep pretty well stored on a shelf in my basement for several months - but about now is when they might start to go south. I check to see if there are any that are sprouting or starting to go soft. These can be chopped and frozen without blanching; the frozen onions can be used in any type of cooked dish but will not have a good texture to use raw.

Apples: We still have some apples down in our basement fridge from our annual apple picking trip at a nearby farm. I suspect they are starting to get a bit on the soft side - which means it's time to make applesauce! If you happen to have a lot of soft apples and make an extra-big batch of applesauce, it can be frozen or canned for longer-term storage. I also have quite a few favourite recipes that use cooked apples, so if the apples start off a bit on the soft side it won't affect the finished dish: Upside-Down Apple Oven Pancake, Pork and Apple Stew, and in my book you'll find Apple and Bacon Baked Beans (p. 177), Sausage and Apple Saute (p.137), Morning Glory Muffins (p.98), Apple Raspberry Squares (p.228) and Basic Fruit Crisp (p.220).

Potatoes: If I find potatoes that are sprouting and going soft, I make up a big batch of mashed potatoes and freeze them in 1 cup portions for use in my Whole Wheat Refrigerator Bread Dough.

Carrots: I usually managed to stagger my purchase of 10 lb bags of carrots so that they stay reasonably fresh stored in my basement fridge; if you have a lot of carrots that are starting to go soft, they can be chopped and frozen. They will need to be blanched first (instructions here).

Squash: Winter squash stores pretty well, but even these can start to get soft at this time of year. When they do, they can be cooked, pureed and frozen in meal-sized portions.

And while you're busy freezing things, it's a good time to check what else might still be in the freezer that needs using up - I need to check on my supply of frozen strawberries, zucchini, tomatoes, and pumpkin to see how much I still have left from last season.

Do you have any favourite strategies for dealing with stored-over-the-winter produce?
Related Posts with Thumbnails